Methods for Determining Perpendicularity
2. Visual Inspection and Estimation
The simplest way to check for perpendicularity is to just eyeball it. Seriously! If you’re dealing with something like hanging a picture, a quick visual assessment can often be enough. Compare the angle you see to a known right angle, like the corner of a piece of paper or a credit card. If it looks close, it probably is! Just don’t rely on this method for anything critical, like building a bridge (please don’t build bridges after only reading this).
Think of it like estimating the height of a building. You might not get it exactly right, but you can usually get a pretty good idea. The same goes for perpendicular lines. Practice makes perfect, so the more you look for right angles in your environment, the better you’ll become at spotting them. Plus, you’ll impress your friends with your newfound right-angle-detecting abilities! “Wow, Brenda, that fence post is remarkably perpendicular!”
Remember that even a slight deviation from 90 degrees can have a significant impact over distance. Imagine a building where the walls are only off by a degree or two. By the time you get to the roof, the walls could be noticeably slanted. So, while visual inspection is a good starting point, it’s not always the most accurate.
When visually inspecting, look for any obvious leaning or tilting. Does one line appear to be slanting towards or away from the other? If so, they’re probably not perpendicular. Try using a straight edge, like a ruler or a piece of cardboard, to help you visualize the angles more clearly. The more you practice, the better you’ll get at spotting those pesky non-perpendicular lines!
3. Using a Protractor
For a more precise measurement, break out the protractor! This trusty tool is designed specifically for measuring angles, making it perfect for determining if two lines are truly perpendicular. Place the center point of the protractor at the intersection of the two lines, and align one of the lines with the 0-degree mark. Now, read the angle measurement where the other line intersects the protractor scale. If it reads 90 degrees, congratulations! You’ve got yourself a pair of perpendicular lines.
Protractors come in different shapes and sizes, but they all work on the same basic principle. Some are semi-circular, while others are full circles. Some have digital displays, while others use a traditional analog scale. Choose the type that you find most comfortable and easy to use. Just make sure it’s accurate! A faulty protractor will lead to faulty measurements, and nobody wants that.
When using a protractor, make sure it’s properly aligned with the lines you’re measuring. A slight misalignment can throw off your measurement, so take your time and double-check your work. If you’re having trouble seeing the scale clearly, try using a magnifying glass. And remember, practice makes perfect! The more you use a protractor, the more comfortable and confident you’ll become.
Beyond simple angle measurement, protractors can also be used to create perpendicular lines. If you need to draw a line that’s perpendicular to an existing line, simply use the protractor to mark a 90-degree angle at the desired point. Then, use a ruler or straight edge to draw the line through that mark. Voila! A perfectly perpendicular line, ready for action.
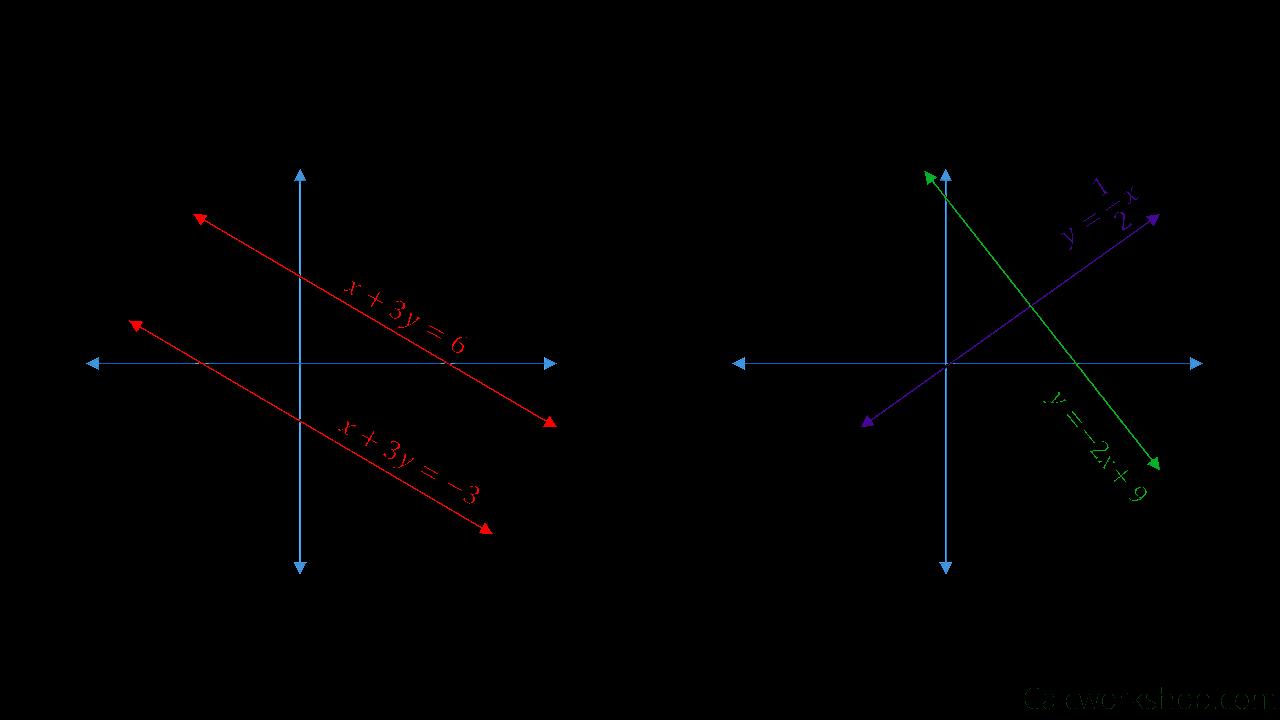
4. The Slope Method
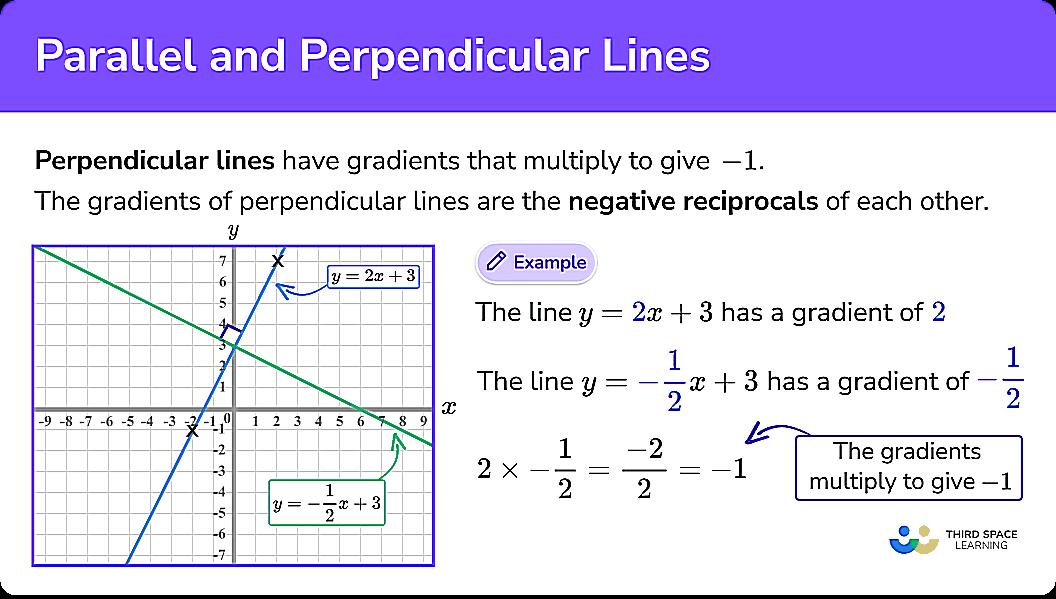
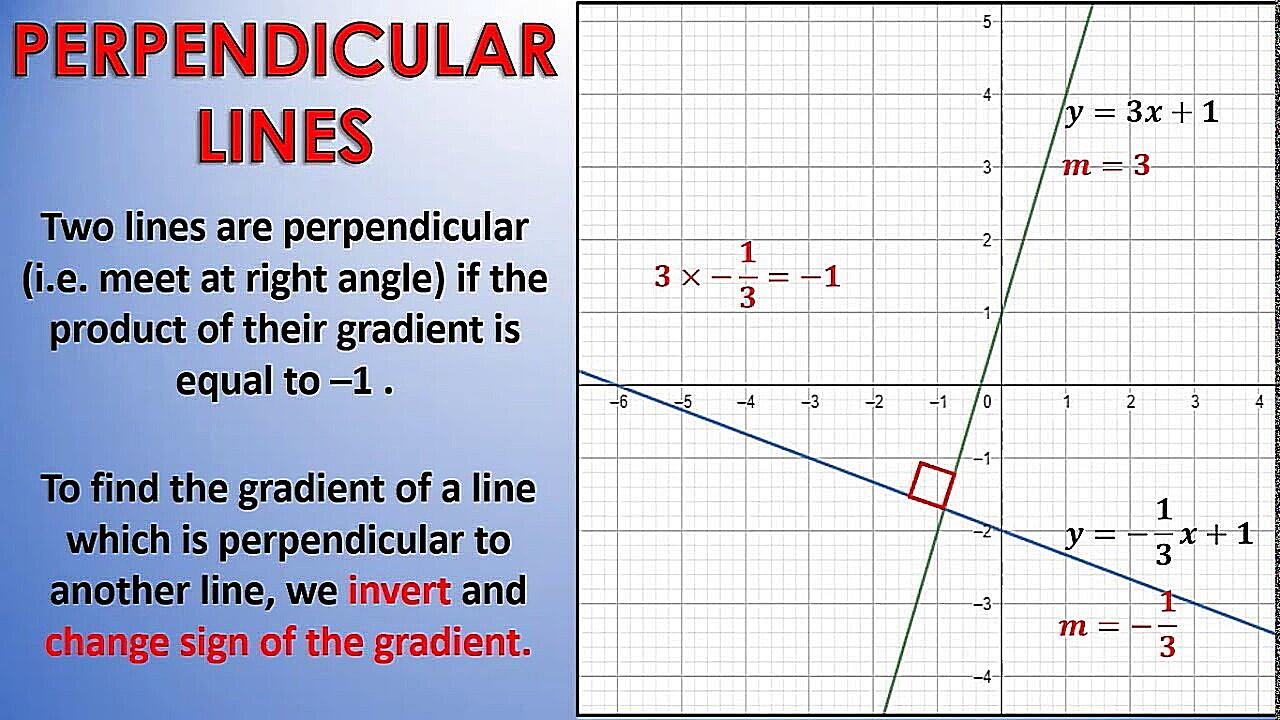
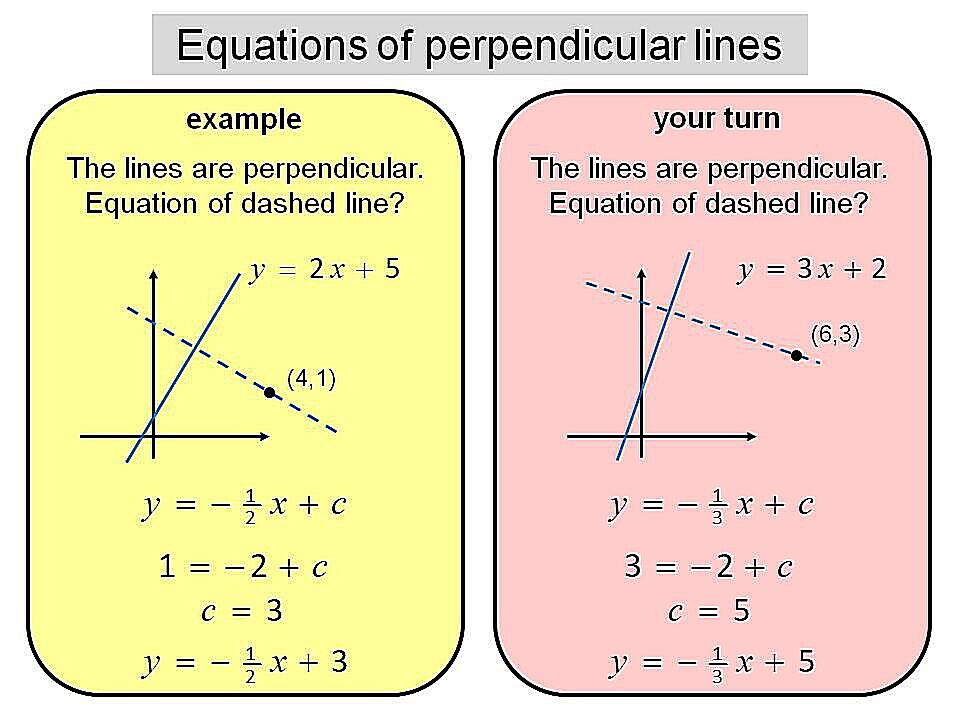
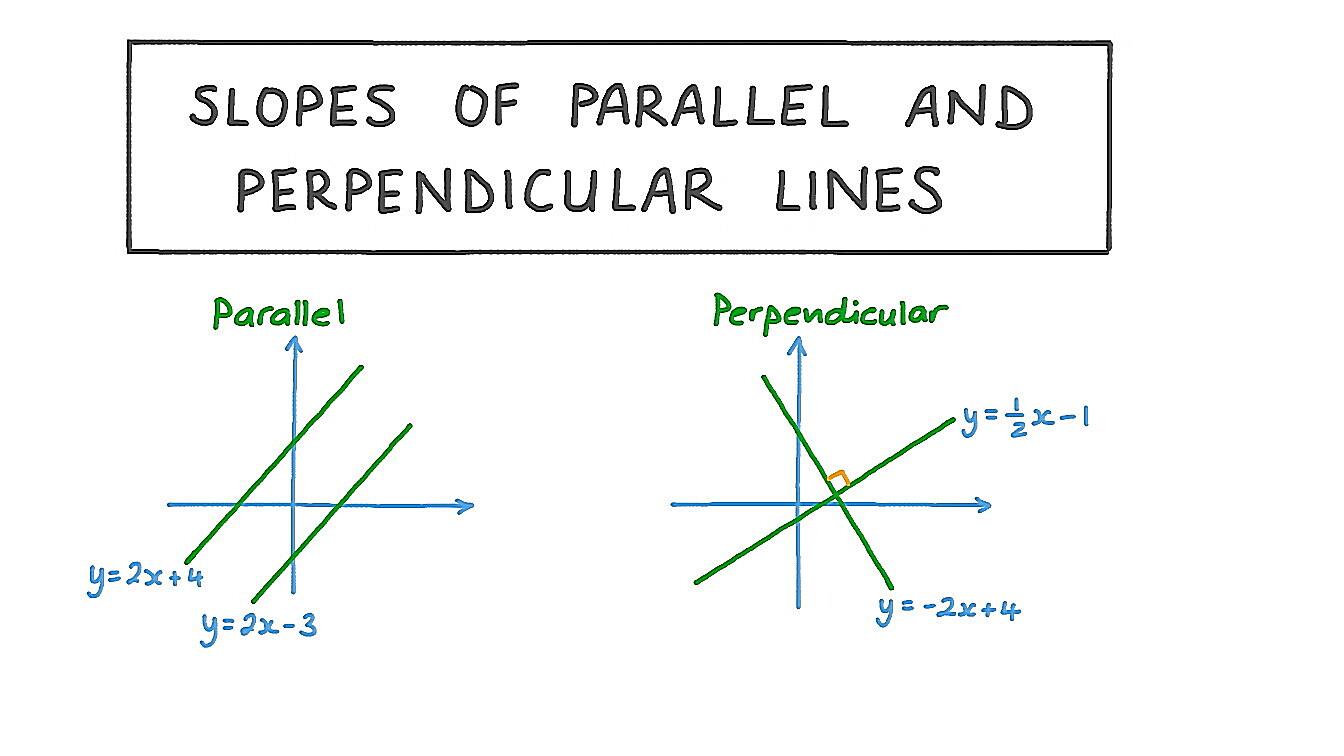
If you’re working with lines on a coordinate plane, you can use the slope method to determine perpendicularity. The slope of a line is a measure of its steepness and direction. Two lines are perpendicular if and only if the product of their slopes is -1. In other words, if one line has a slope of ‘m’, the slope of a line perpendicular to it will be ‘-1/m’. Sounds complicated? Don’t worry, we’ll break it down.
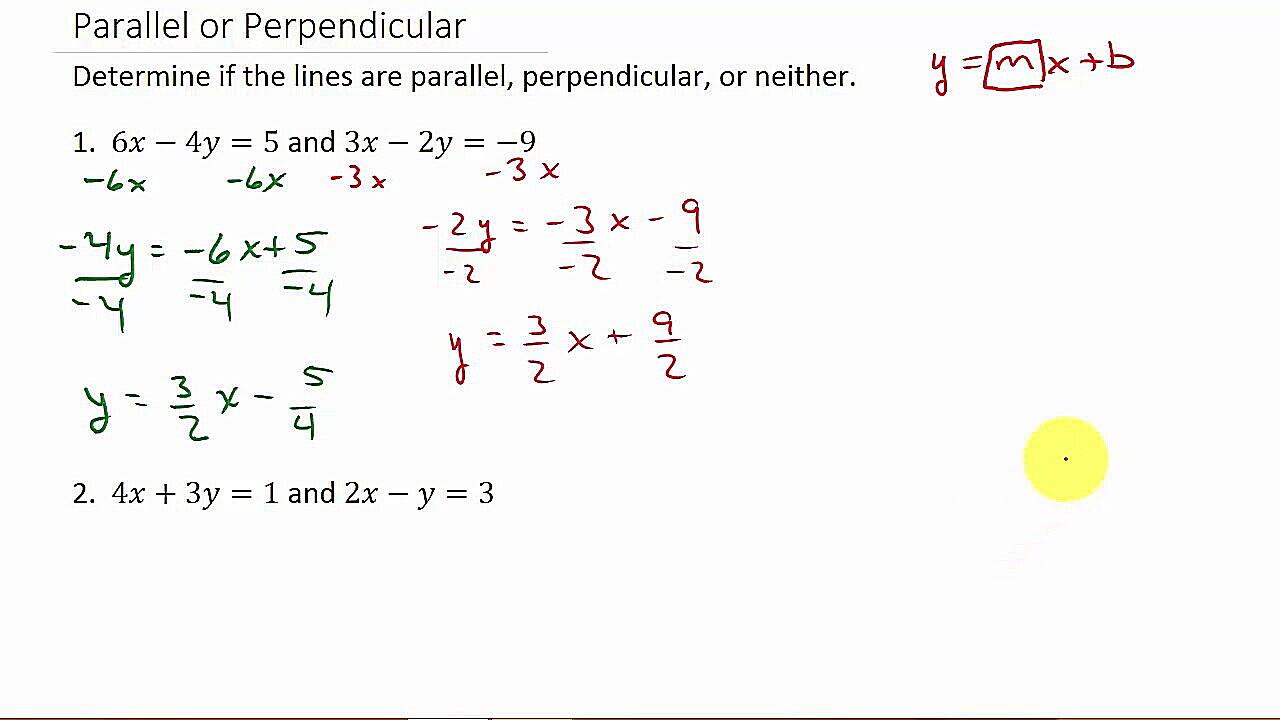
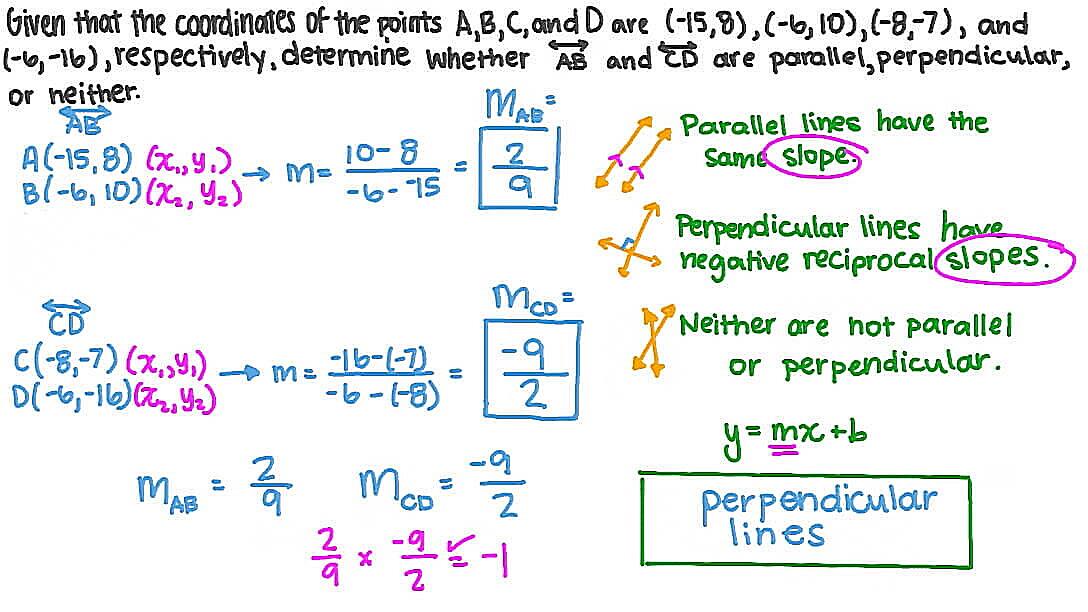
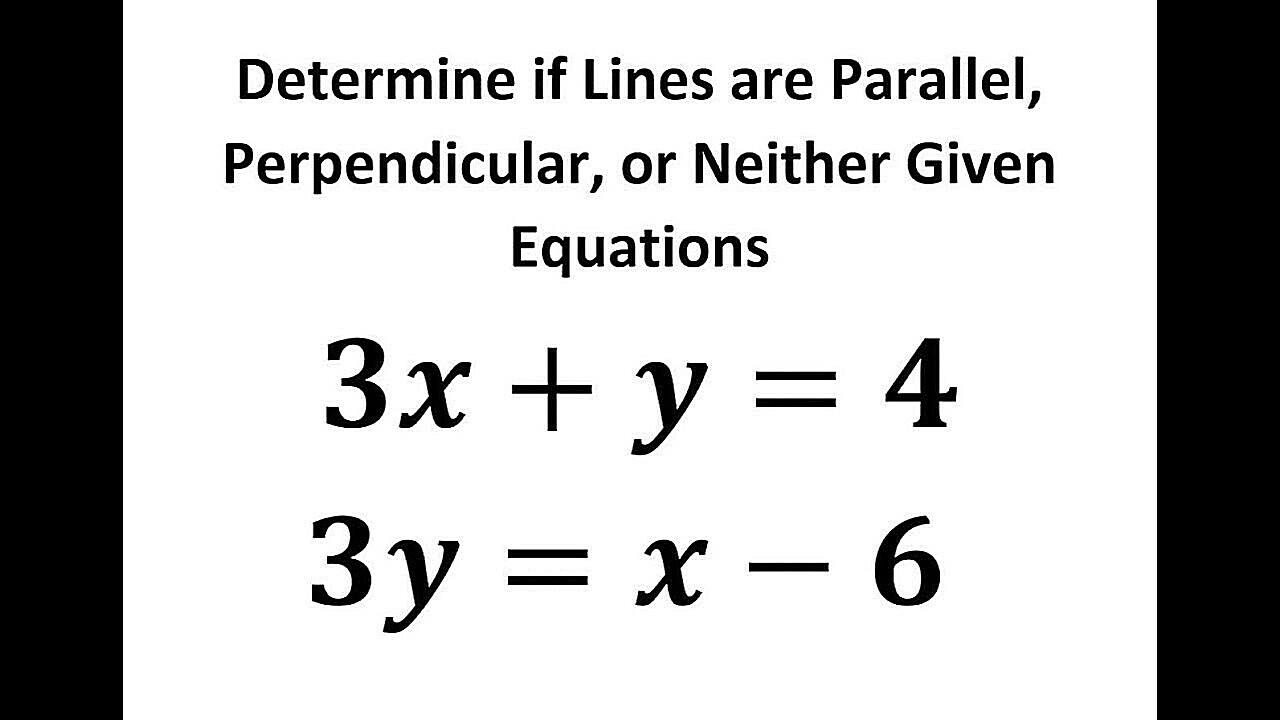
First, you need to find the slopes of the two lines. Remember the formula: slope (m) = (y2 – y1) / (x2 – x1), where (x1, y1) and (x2, y2) are any two points on the line. Calculate the slopes of both lines using this formula. Then, multiply the two slopes together. If the result is -1, then the lines are perpendicular. If it’s anything else, they’re not.
Let’s say you have one line with a slope of 2. A line perpendicular to it would have a slope of -1/2 (which is -0.5). Multiply them together: 2 * (-0.5) = -1. Bingo! Perpendicular lines! This method is particularly useful when you’re working with equations of lines, as you can easily determine their slopes from the equations.
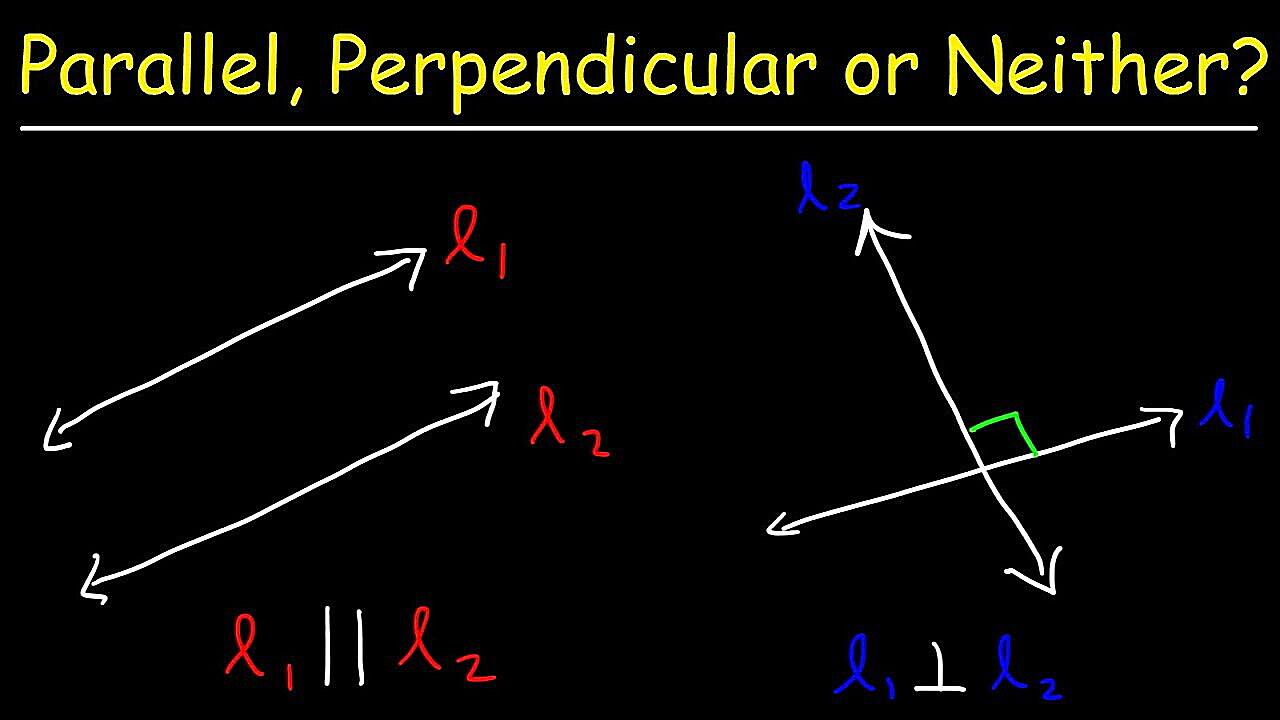
This method works because the slope represents the “rise over run” of a line. A line with a positive slope rises as you move to the right, while a line with a negative slope falls. Perpendicular lines have slopes that are negative reciprocals of each other, which means that one line rises while the other falls, and their rates of change are inversely related. This ensures that they intersect at a perfect 90-degree angle.