

Decoding Voltage Measurement
1. Understanding the Basics
So, you’re diving into the world of electrical measurements, huh? Awesome! Using a VOM (Volt-Ohm-Milliammeter, also known as a multimeter) to measure voltage is a foundational skill. Think of it like learning to ride a bike; once you get it, you’ll be zipping around, troubleshooting circuits with confidence. Don’t worry, it’s not as intimidating as it might seem. This guide will walk you through the process, step-by-step, so you can connect your VOM correctly and get accurate readings.
Before we even think about touching any wires, safety first! Make sure the power is off to the circuit you’re testing. I know, I know, it sounds obvious, but it’s the golden rule of electrical work. Treat electricity with respect, and it’ll (usually) treat you the same. Also, double-check that your VOM is in good working order, with no frayed wires or cracked cases. A quick visual inspection can save you a shocking experience (pun intended!).
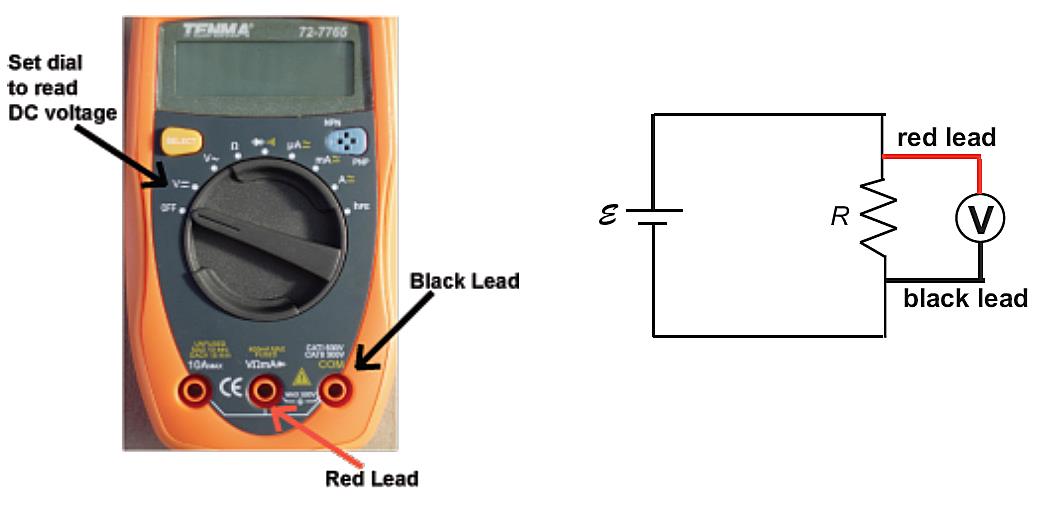
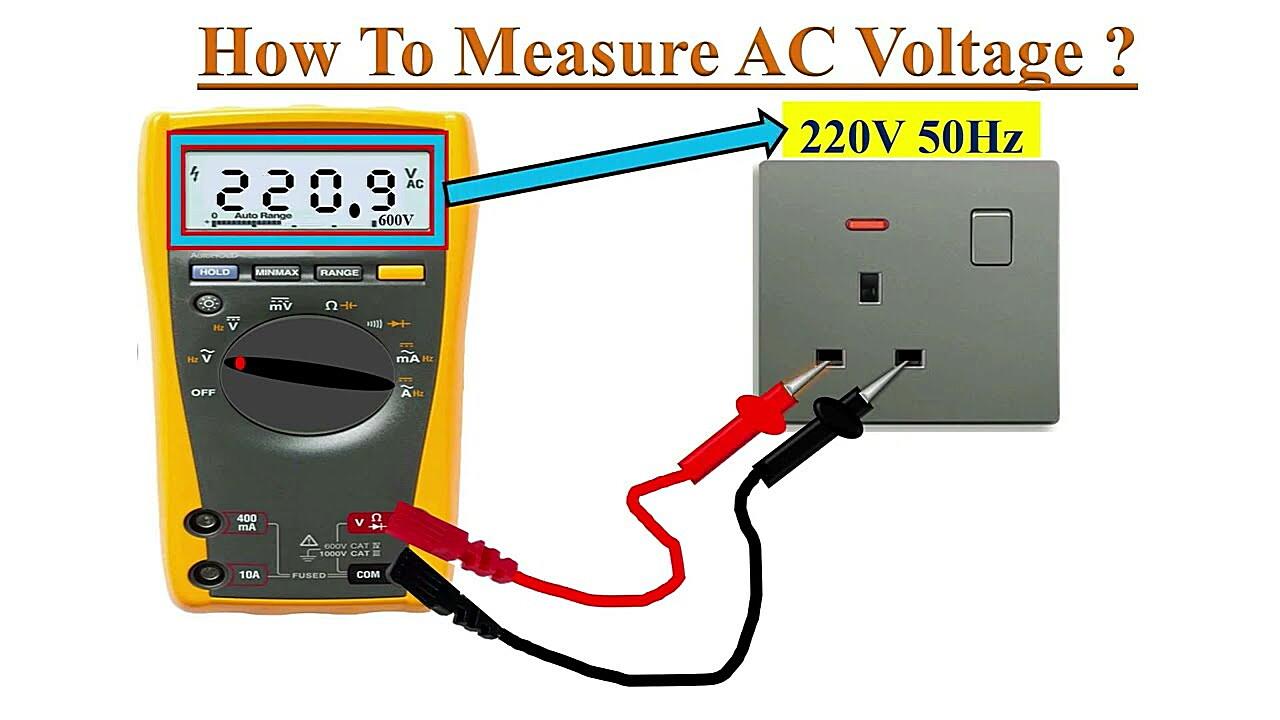
Now, locate the voltage setting on your VOM. It’s usually marked with a “V” and can be either AC (alternating current) or DC (direct current), sometimes even both on the same dial. Make sure you select the correct type of voltage for the circuit you’re testing. Confusing AC and DC is a common mistake, like putting diesel in a gasoline engine — not a good idea. If you’re unsure, consult the circuit diagram or do a little research. It’s better to be safe than sorry, or have a multimeter that gives you inconsistent readings.
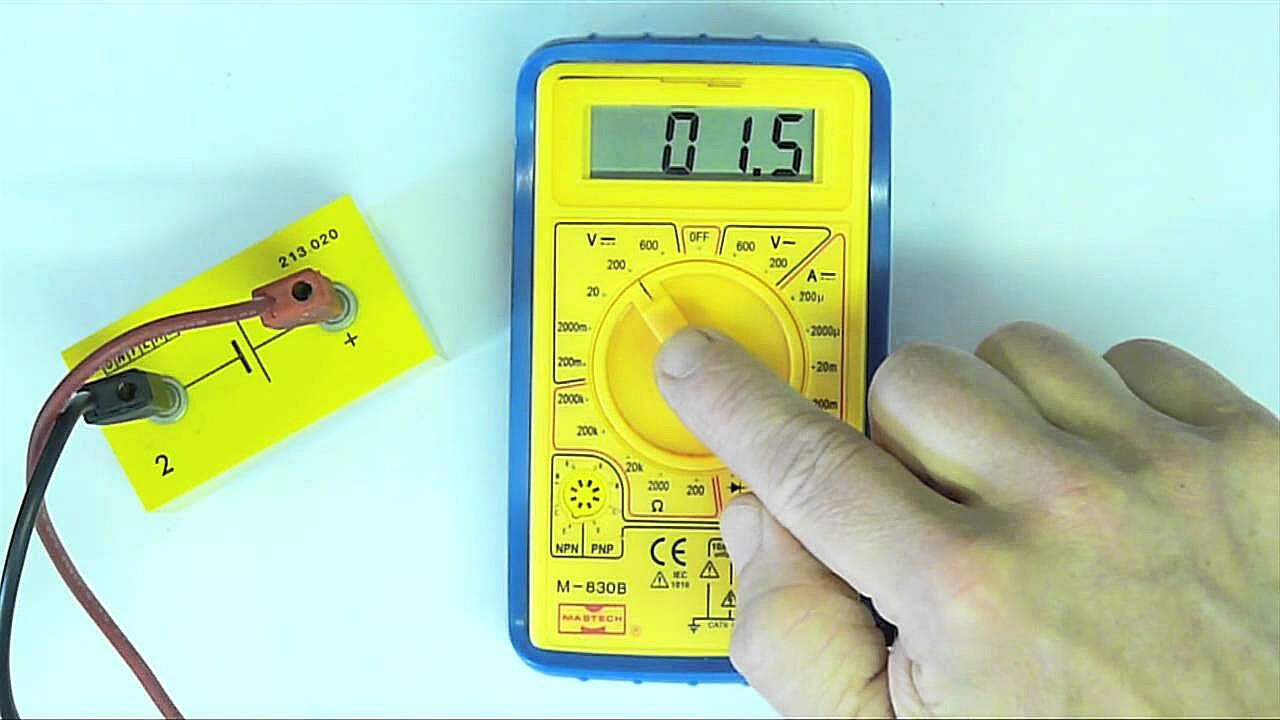
Still with me? Great! Next, identify the voltage range on your VOM. If you have a manual ranging VOM, start with the highest voltage range. This prevents overloading the meter. If you’re using an auto-ranging meter (which is a little fancier), it will automatically select the appropriate range. Basically, a fancy auto-ranging meter helps prevent your meter from a short circuit.
The Nitty-Gritty
2. The Red and Black Dance
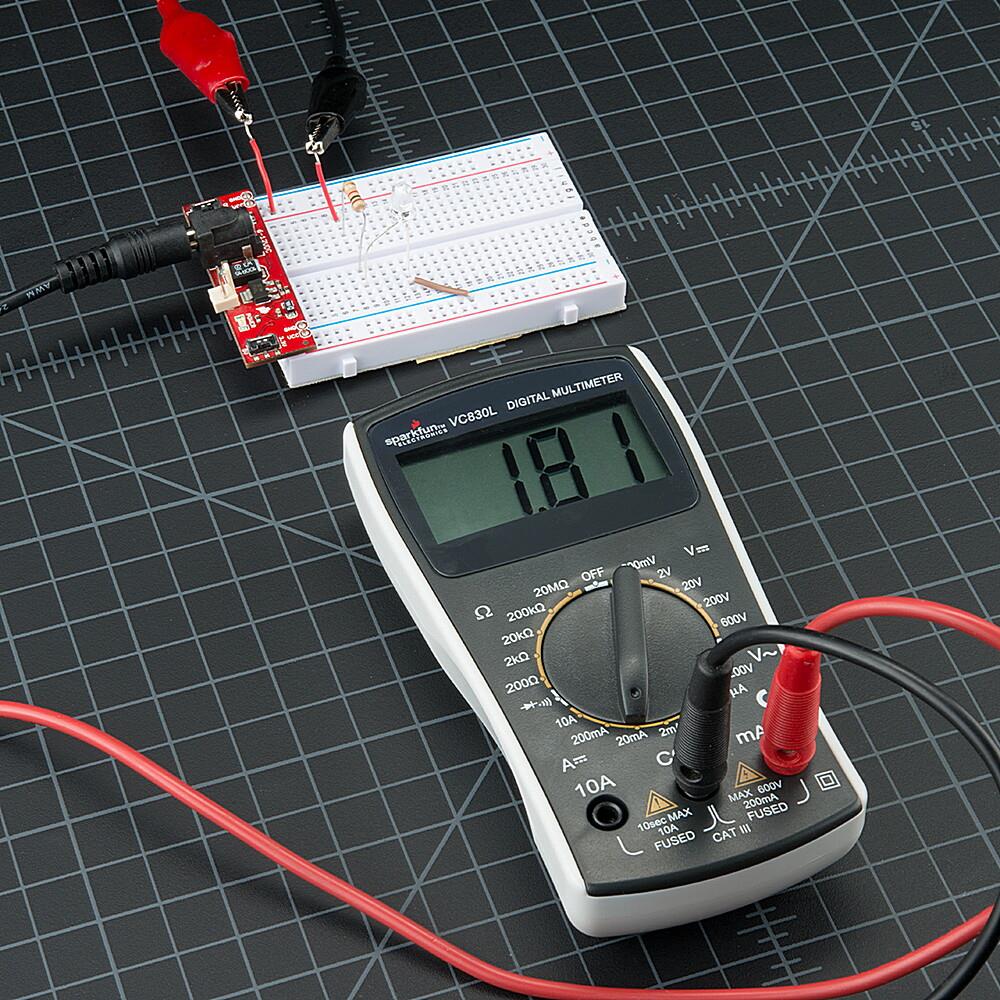
Alright, let’s get down to brass tacks — connecting those probes! Your VOM will have two probes: a red one (positive) and a black one (negative or common). Think of them as the dancers in this voltage measurement ballet. The red probe usually plugs into the terminal marked “V” or “VmA,” while the black probe plugs into the terminal marked “COM” or “Common.” Make sure they’re securely plugged in before you proceed. Loose connections can lead to inaccurate readings or even damage the meter.
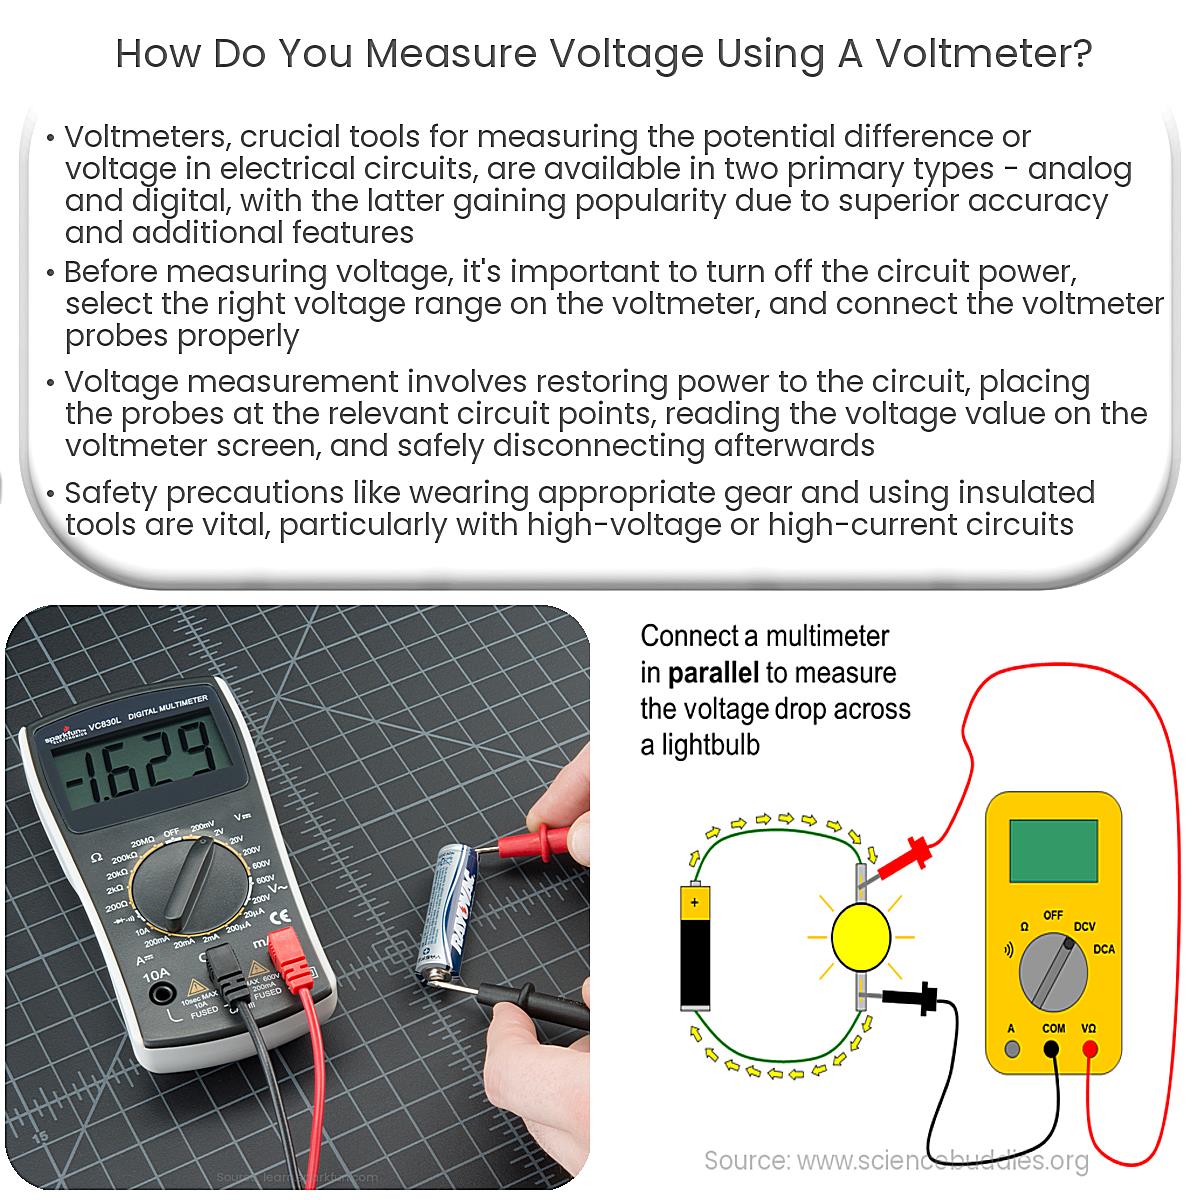
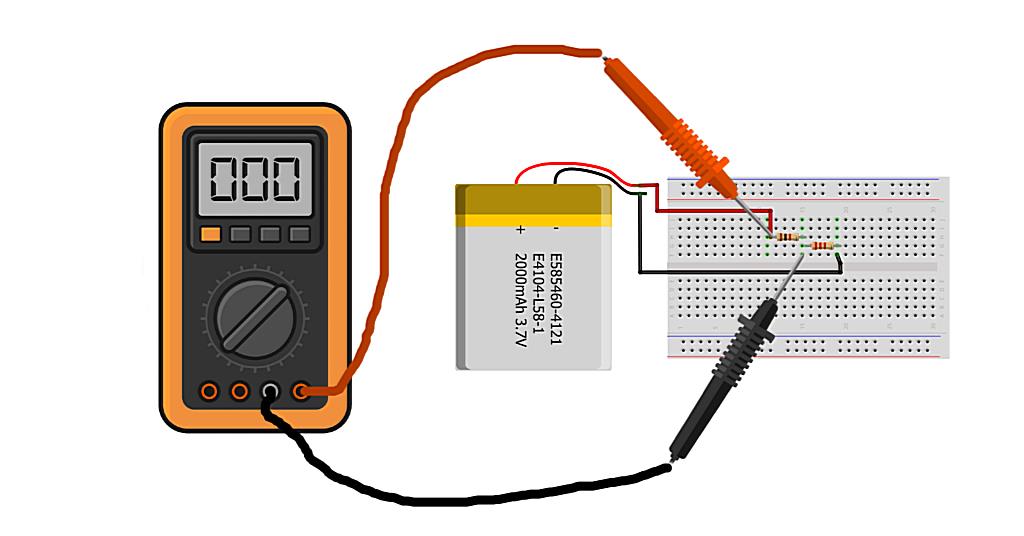
Now, here’s the crucial part: connecting the probes to the circuit. When measuring voltage, you’re always measuring the potential difference between two points. Therefore, you’ll need to connect the probes in parallel with the component or circuit you’re testing. That means you’re placing the probes alongside each other, not breaking the circuit to insert the meter. For example, if you’re measuring the voltage across a resistor, you’ll place the red probe on one side of the resistor and the black probe on the other side.
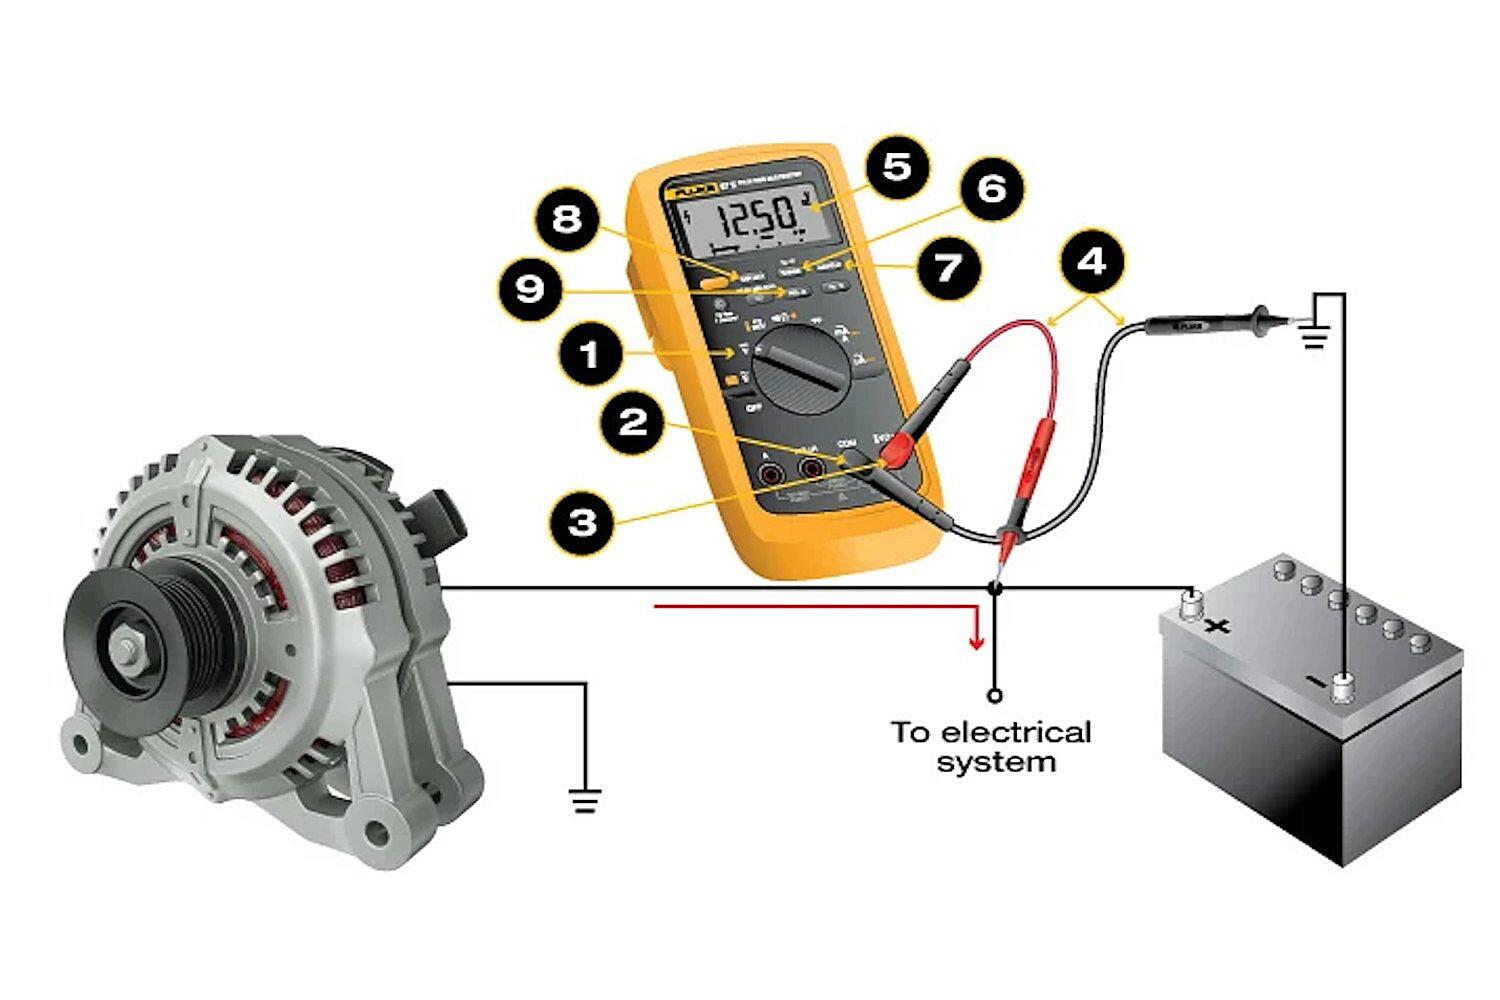
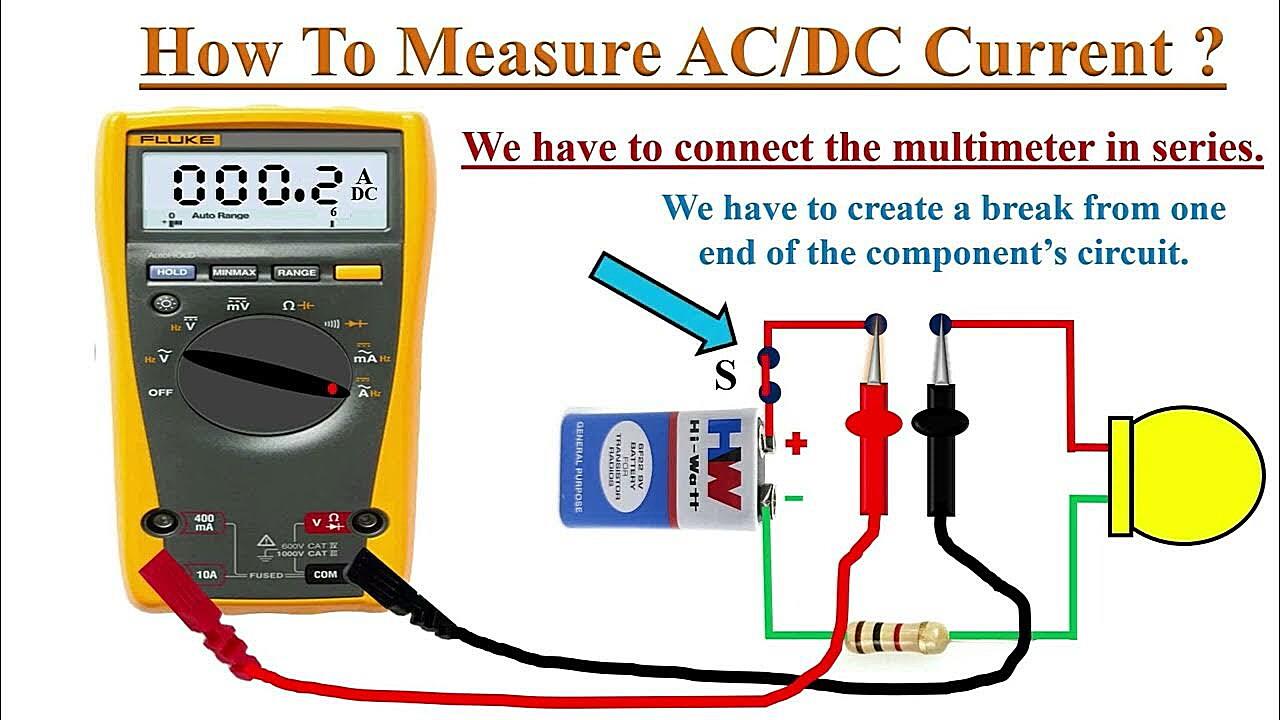
Got it? Let’s try another example. Imagine you’re measuring the voltage of a battery. The red probe goes on the positive (+) terminal, and the black probe goes on the negative (-) terminal. See? It’s like connecting the dots! Just remember, parallel connection is key for accurate voltage measurement. Don’t try to measure voltage in series; that’s a recipe for disaster (and likely a blown fuse in your VOM).
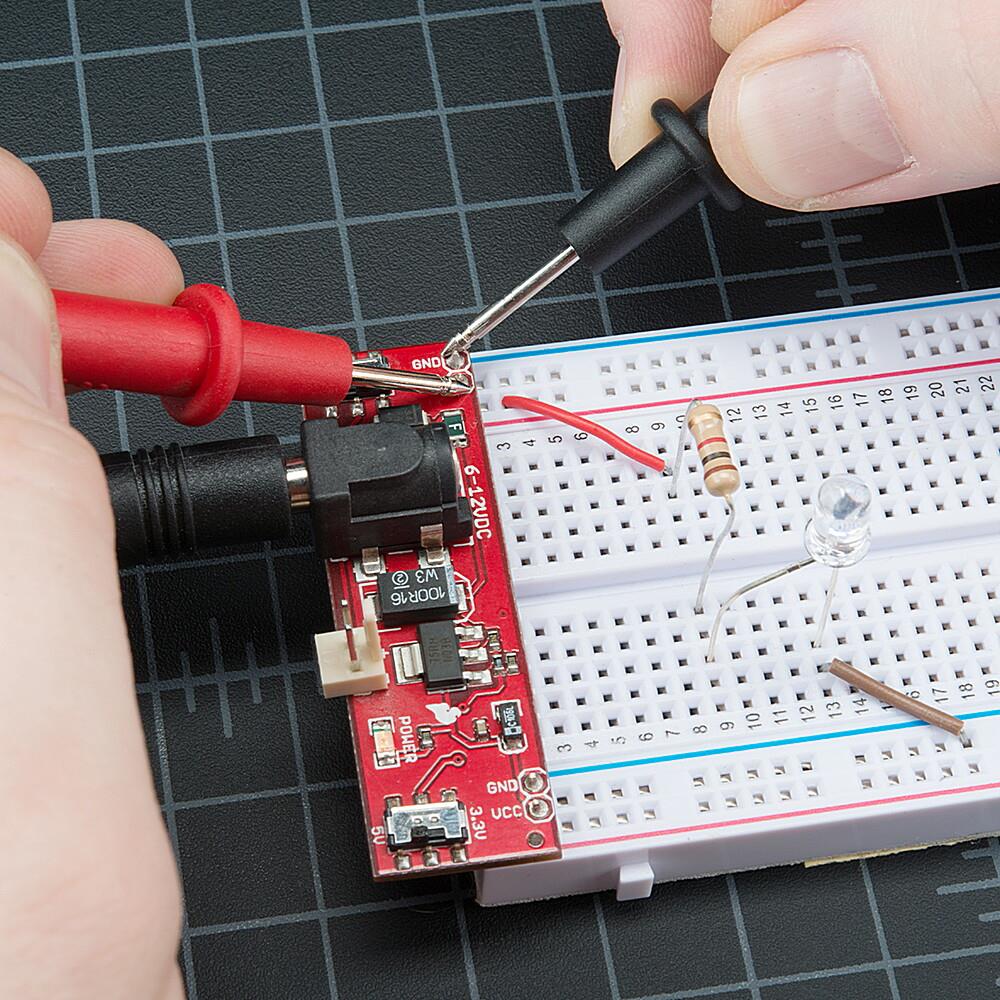
One more thing about probe placement: make sure the probes are making good contact with the circuit. A loose connection can give you fluctuating or inaccurate readings. If you’re working with small components, consider using probe tips or alligator clips for a more secure connection. Sometimes, a little wiggle can help ensure a solid contact. But remember, safety first! Keep your fingers away from exposed wires and components while the circuit is powered.
Reading the Voltage Display
3. Interpreting the Numbers
Okay, the probes are connected, and your VOM is set. Now comes the moment of truth: reading the voltage display. The VOM will display the voltage between the two points you’re measuring. The unit will be volts (V), millivolts (mV), or kilovolts (kV), depending on the voltage level and the setting you’ve selected on your VOM. Pay close attention to the decimal point and the unit of measurement to avoid misinterpreting the reading.
If you’re using a manual ranging VOM and the display shows “OL” or “1,” it means the voltage you’re measuring is higher than the range you’ve selected. In this case, switch to a higher voltage range and try again. Auto-ranging meters, on the other hand, will automatically adjust the range for you, making things a bit easier. But even with an auto-ranging meter, it’s always a good idea to estimate the voltage range beforehand to avoid surprises.
The reading on the VOM should be relatively stable. If you’re seeing wildly fluctuating numbers, it could indicate a loose connection, a faulty component in the circuit, or a problem with your VOM itself. Double-check your probe connections and make sure everything is secure. If the problem persists, try testing a known voltage source (like a battery) to verify that your VOM is working correctly.
Also, remember that voltage readings can vary slightly depending on the circuit conditions. Factors like temperature, load, and component tolerances can all affect the voltage. Don’t expect your readings to be exactly the same as the theoretical values listed in a circuit diagram. A small amount of variation is normal. But if you’re seeing significant deviations, it’s time to investigate further. That’s where your troubleshooting skills come into play!
Safety First, Always!
4. Electricity is Not a Toy
We’ve touched on safety a few times already, but it’s worth repeating: electricity is not a toy. Always take precautions when working with electrical circuits. Here’s a quick recap of the key safety rules: turn off the power before working on any circuit, double-check your VOM and probes for damage, use insulated tools, and keep your fingers away from exposed wires and components.
If you’re unsure about any aspect of voltage measurement or electrical safety, consult a qualified electrician. It’s always better to be safe than sorry. Trying to fix an electrical problem without the proper knowledge and skills can be dangerous, not only for you but also for others. Electricity can cause serious injuries, including burns, shocks, and even death.
Also, consider investing in some personal protective equipment (PPE), such as safety glasses and insulated gloves. These items can help protect you from potential hazards. And remember, a little common sense goes a long way. If something doesn’t seem right, don’t proceed. Take a step back, reassess the situation, and consult an expert if necessary.
Finally, never work on electrical circuits when you’re tired, distracted, or under the influence of alcohol or drugs. Your judgment and reflexes may be impaired, increasing the risk of accidents. So, stay sharp, stay focused, and stay safe. With the right knowledge and precautions, you can measure voltage with confidence and avoid any shocking surprises.
Troubleshooting Common Issues
5. When Things Go Wrong
Sometimes, despite your best efforts, things can go wrong. You might get unexpected readings, the VOM might not display anything at all, or you might even smell something burning (which is never a good sign!). Don’t panic! Troubleshooting is a normal part of electrical work. Here are a few common issues and how to address them:
No Display: If your VOM isn’t displaying anything, the first thing to check is the battery. A dead battery is a common culprit. Replace the battery and try again. If that doesn’t work, check the fuse. A blown fuse can also prevent the VOM from working. Replace the fuse with the correct type and rating. If the VOM still doesn’t work, it might be time to consult a repair technician or invest in a new meter. Sometimes, electrical gremlins just win.
Inaccurate Readings: Inaccurate readings can be caused by a variety of factors, including loose connections, faulty probes, or a malfunctioning VOM. Double-check your probe connections and make sure they’re secure. Try cleaning the probe tips with a cotton swab and isopropyl alcohol. If the readings are still inaccurate, try using a different VOM or a known voltage source to verify your measurements.
Fluctuating Readings: Fluctuating readings can indicate a loose connection, a noisy circuit, or a problem with the VOM itself. Check your probe connections and make sure they’re tight. If the circuit is noisy, try adding a capacitor to filter out the noise. If the problem persists, try using a different VOM or consulting an expert.
FAQ
6. Quick Answers to Common Queries
Still got questions buzzing around in your brain? No problem! Here are a few frequently asked questions about measuring voltage with a VOM:
Q: What happens if I connect the probes backwards?A: If you connect the probes backwards (red to negative and black to positive), the VOM will usually display a negative voltage reading. This won’t damage the VOM, but it’s important to note the correct polarity, especially when working with DC circuits.
Q: Can I measure voltage in a live circuit?A: Yes, you can measure voltage in a live circuit, but it’s crucial to take precautions to avoid electrical shock. Make sure you’re using insulated tools, wearing PPE, and keeping your fingers away from exposed wires and components. If you’re unsure about any aspect of the measurement, consult a qualified electrician.
Q: How do I choose the correct voltage range on a manual ranging VOM?A: Start with the highest voltage range and work your way down until you get a reading on the display. This prevents overloading the meter. If the display shows “OL” or “1,” it means the voltage is higher than the range you’ve selected. If you have a rough idea of the expected voltage, you can start with a range slightly above that value.