
Parallel Switch Connections
1. Understanding the Basics of Parallel Circuits
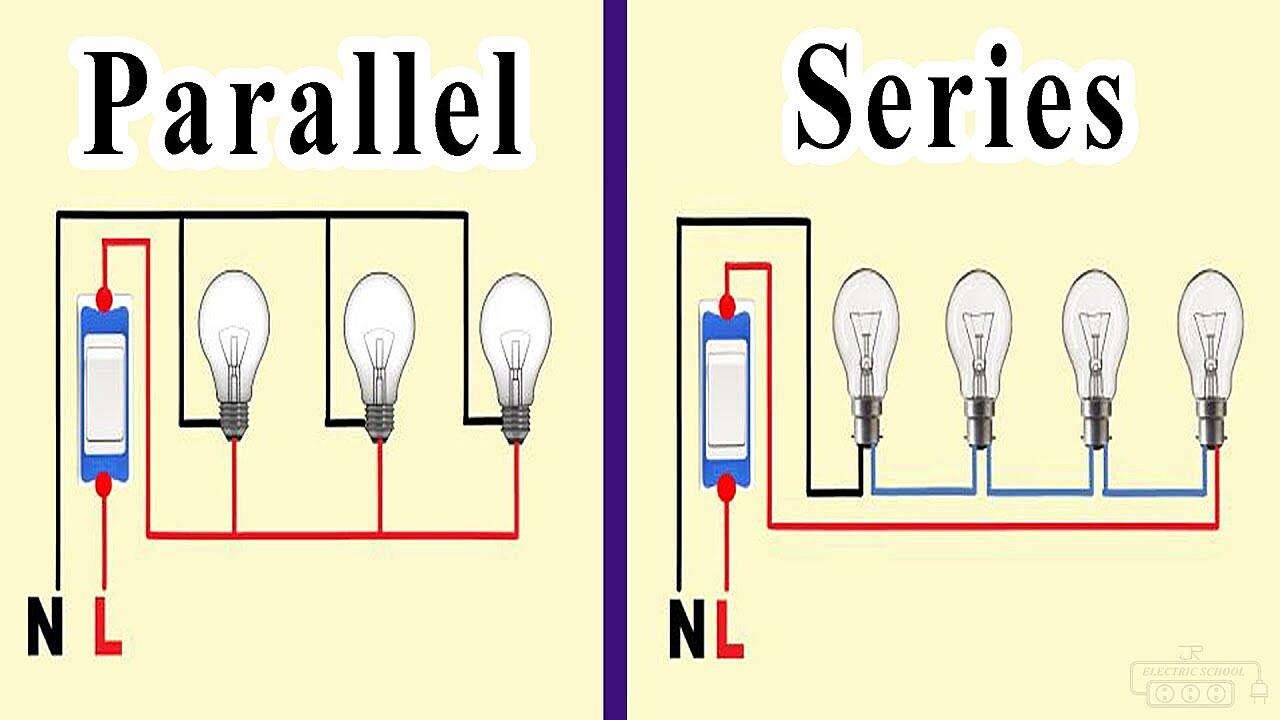
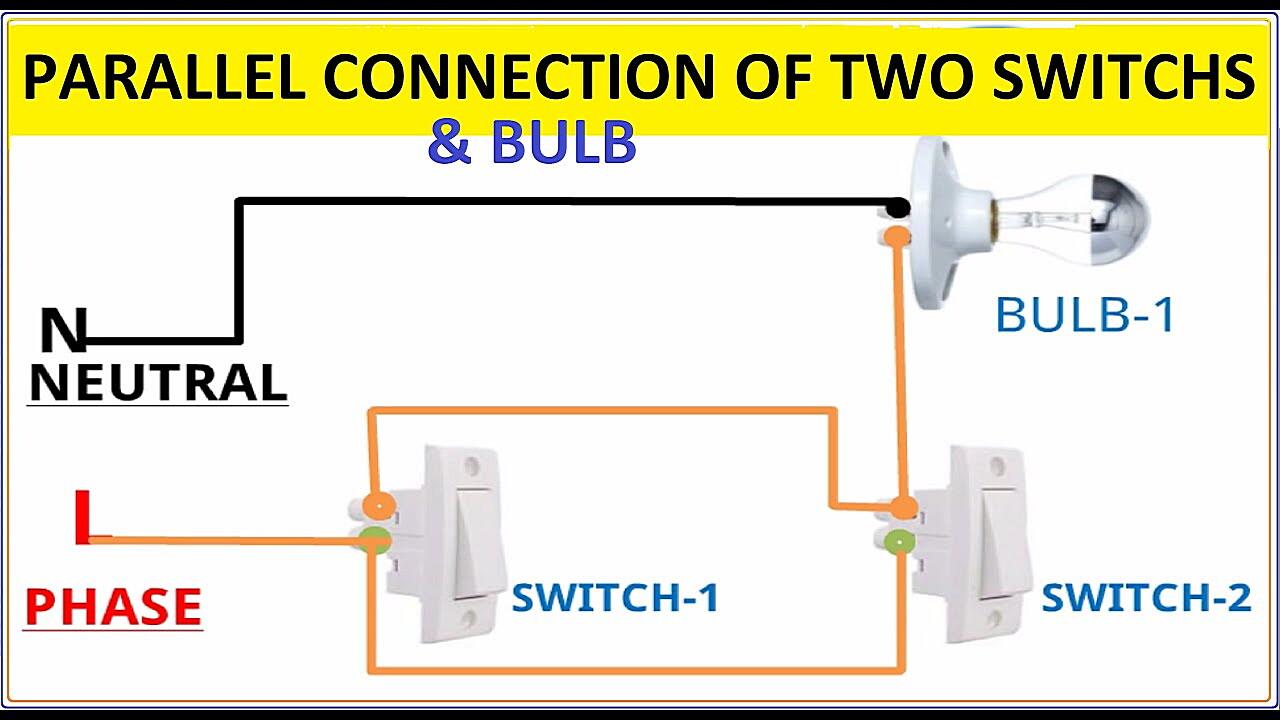
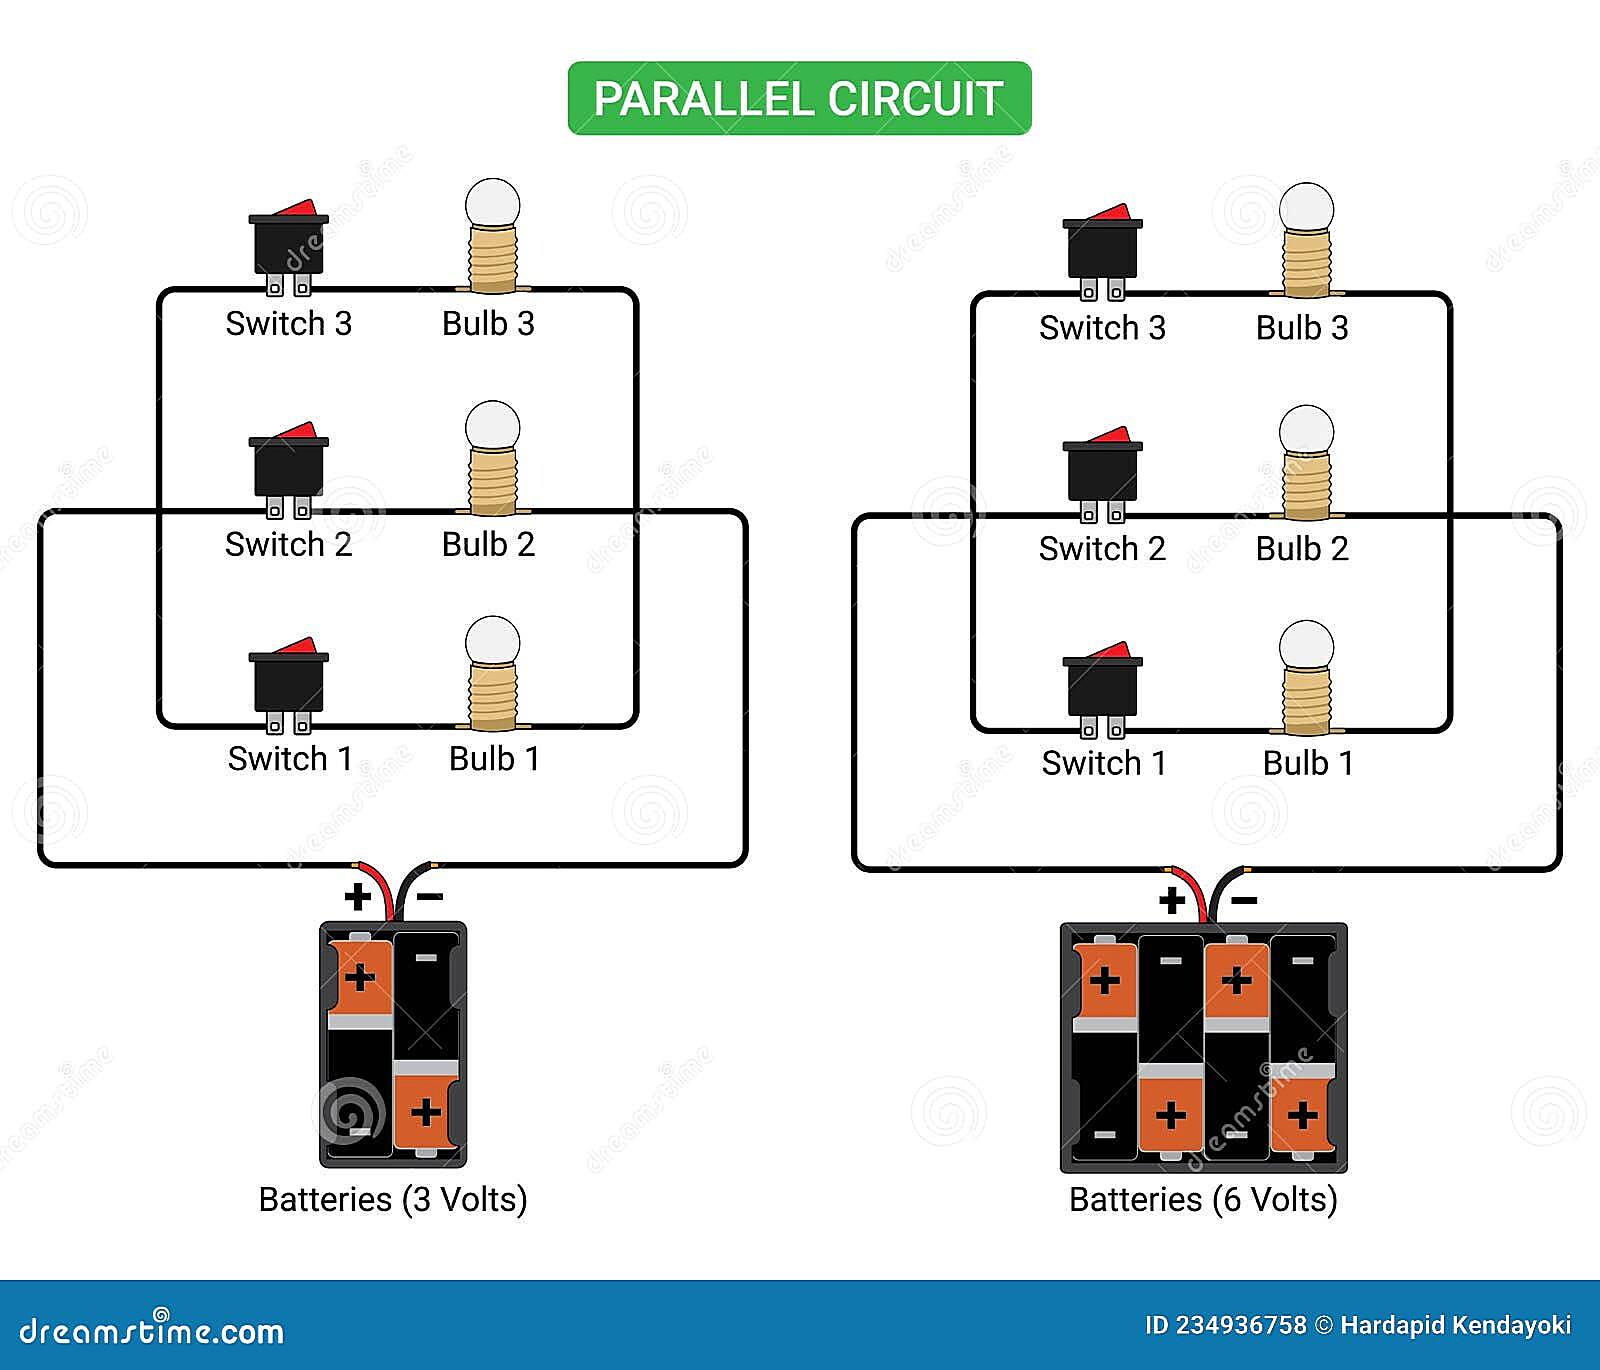
Ever wondered if you could wire up switches so that either one can turn on a light? The answer is yes, and it involves connecting switches in parallel. Think of it like having two doors to the same room — either door gets you inside! In electrical terms, a parallel circuit provides multiple pathways for current to flow. When applied to switches, this means either switch completing its path will activate the connected device.
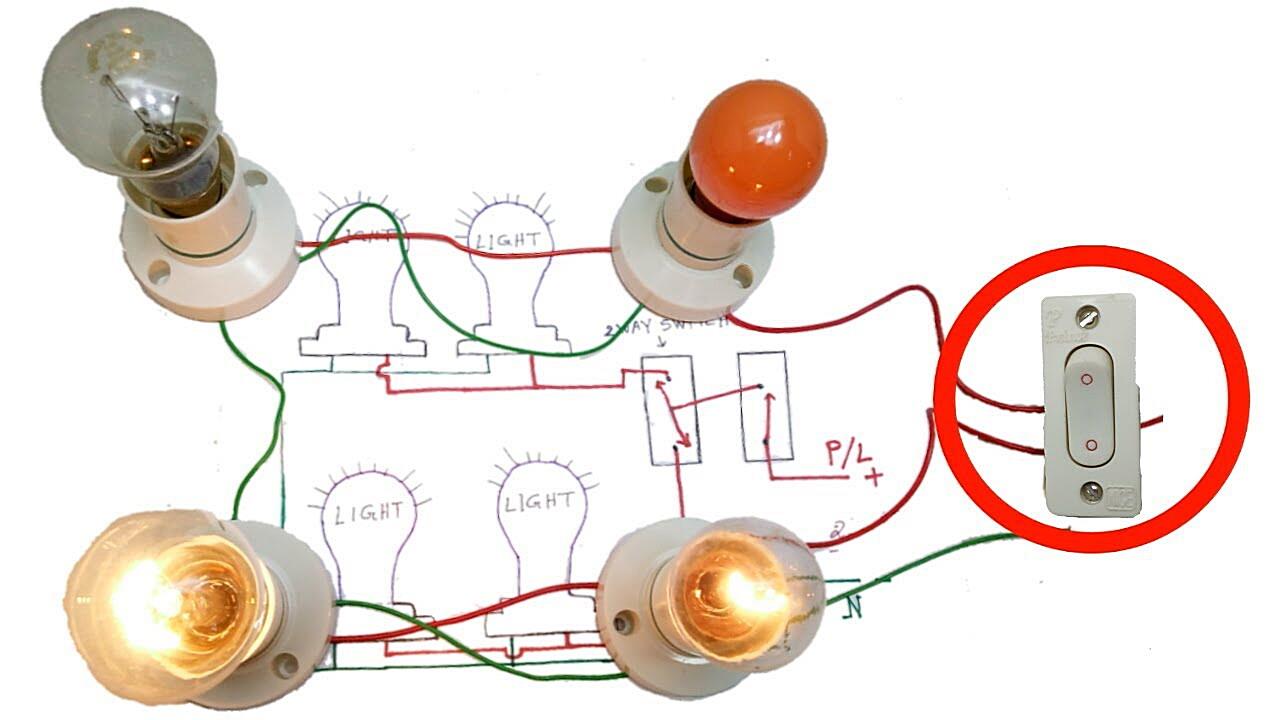
Imagine you have a hallway light you want to control from both ends. You wouldn’t want to walk down the hall in the dark just because the switch at the other end is off, right? That’s where parallel switch wiring comes to the rescue. It offers convenience and redundancy, ensuring the light can always be turned on or off from multiple locations. It’s all about giving you options and making your life a little easier.
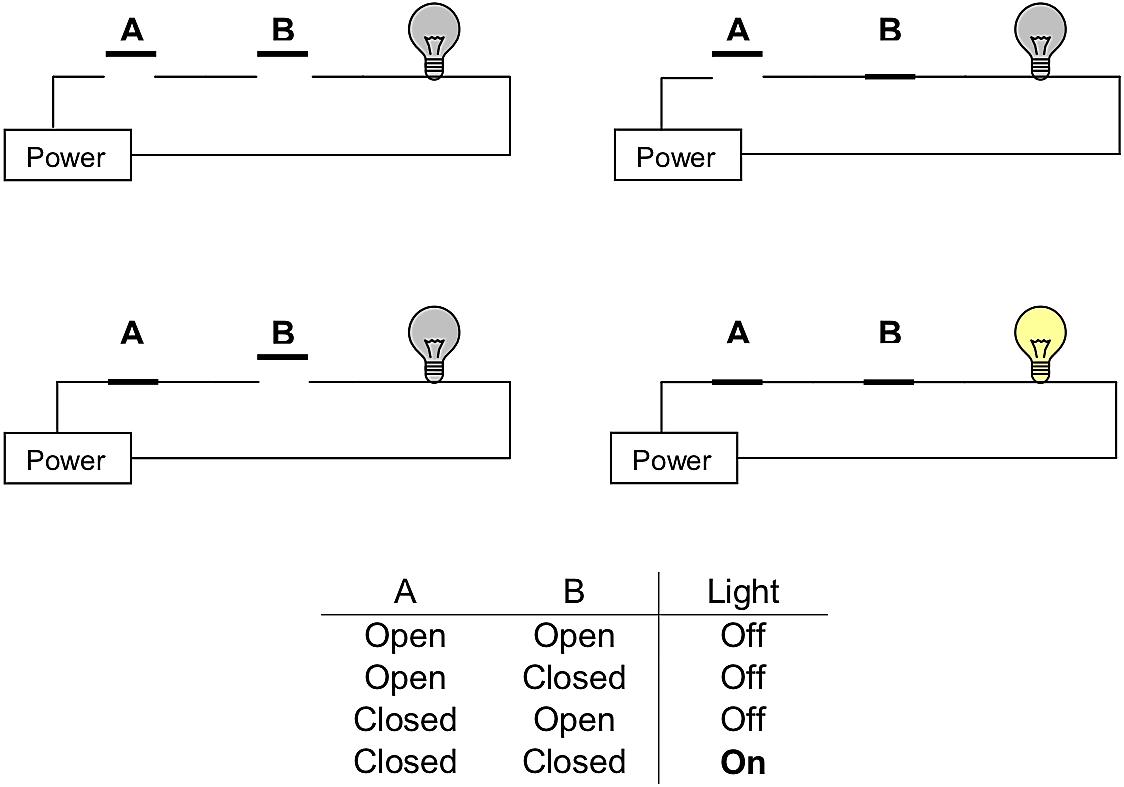
The beauty of a parallel configuration lies in its simple logic: if any switch is closed (on), the circuit is completed, and the connected device (like a light) activates. If all switches are open (off), the circuit remains incomplete, and the device stays off. No complicated algorithms or fancy gadgets needed, just a straightforward application of electrical principles.
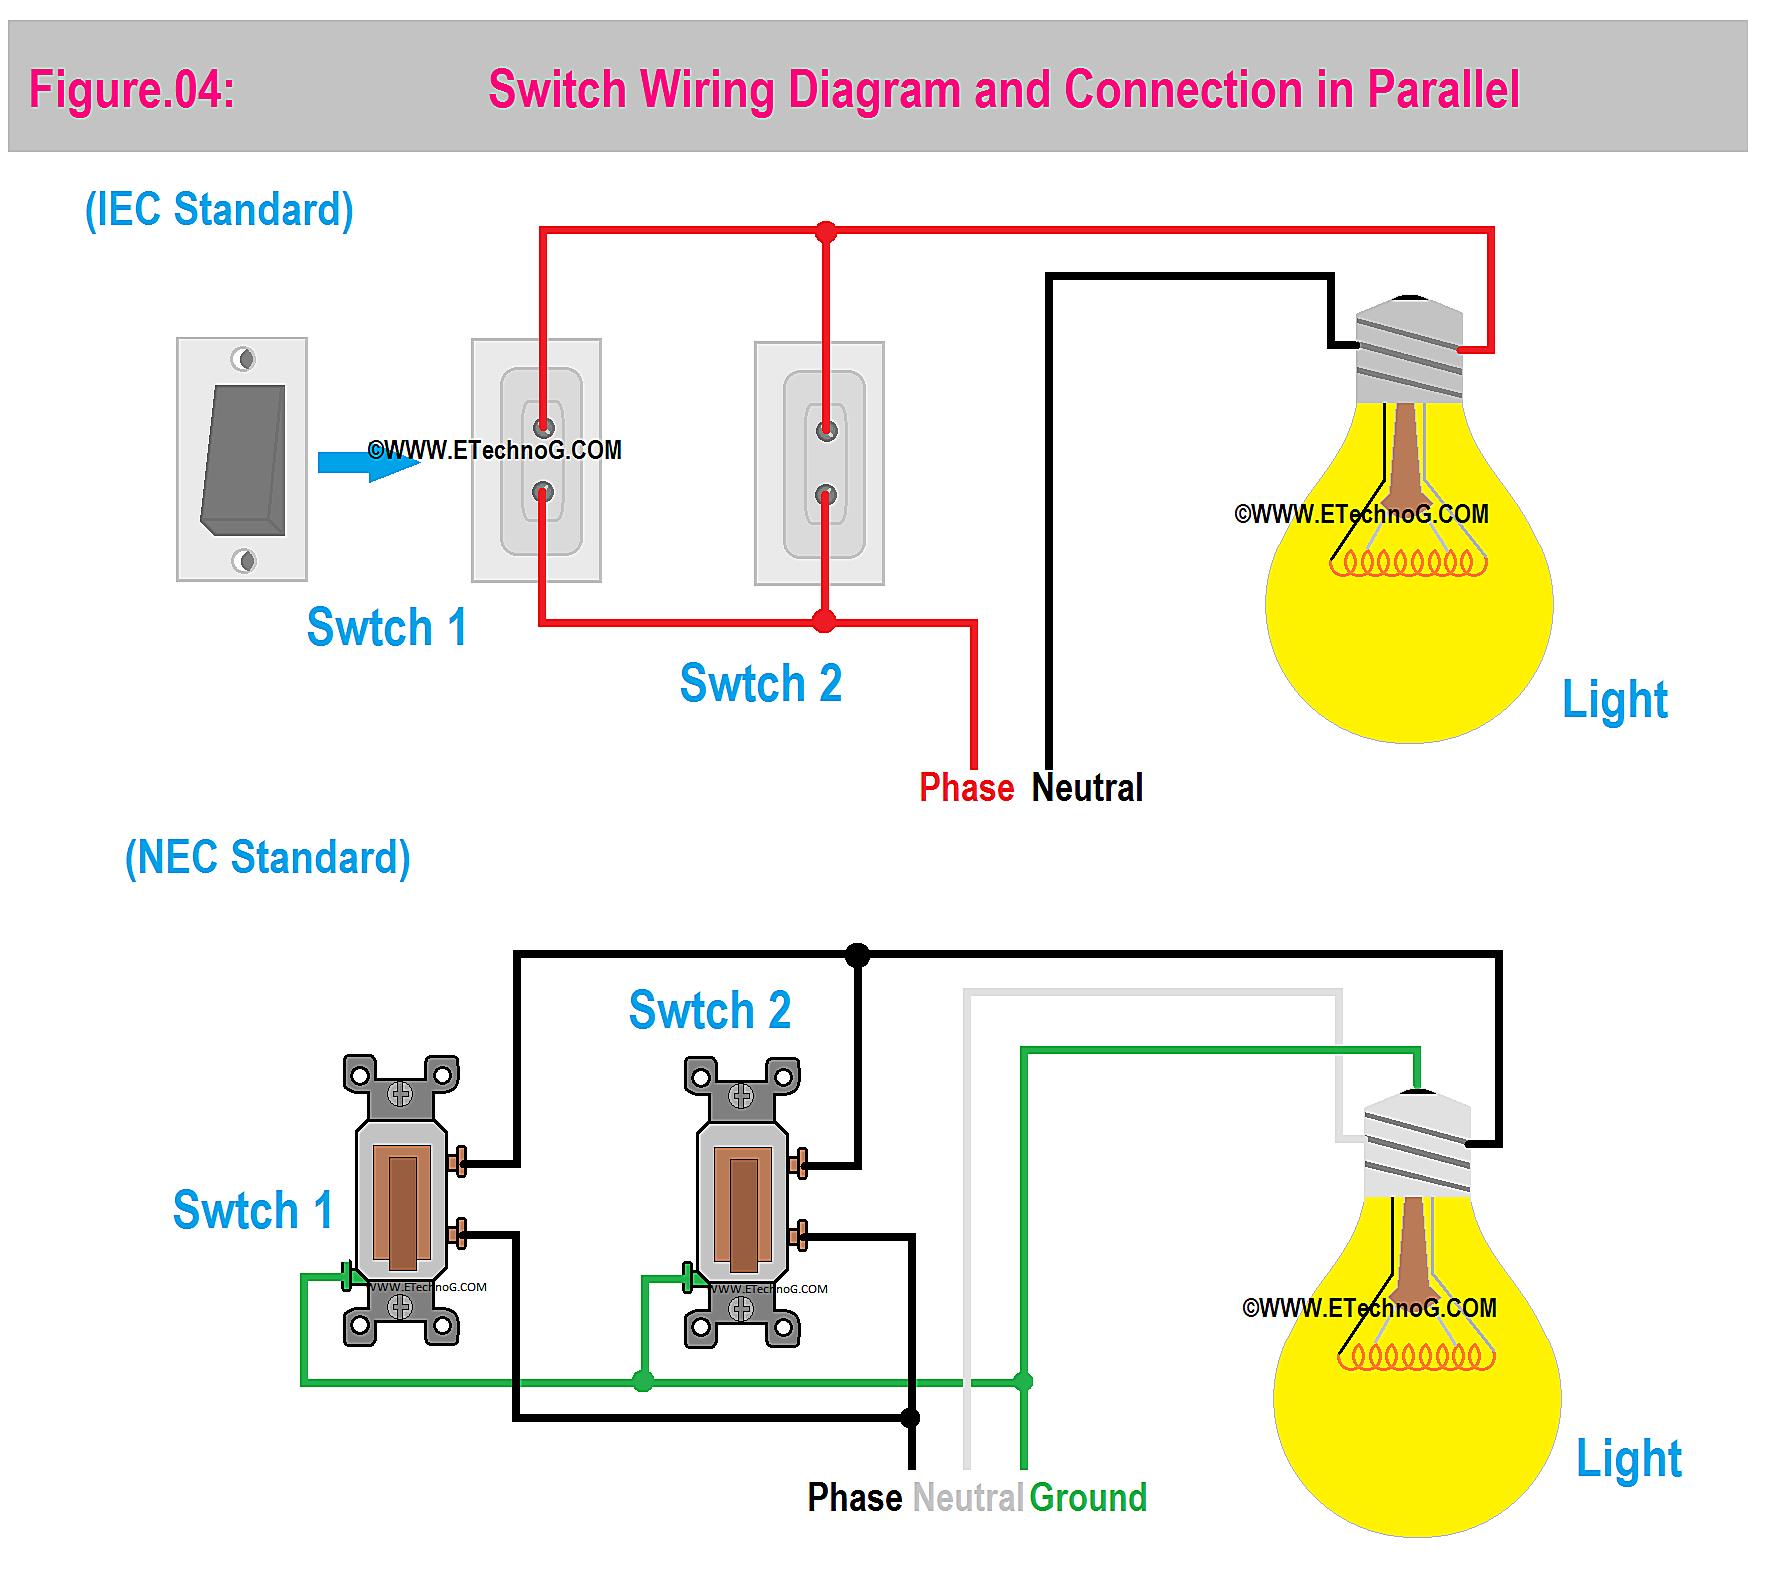
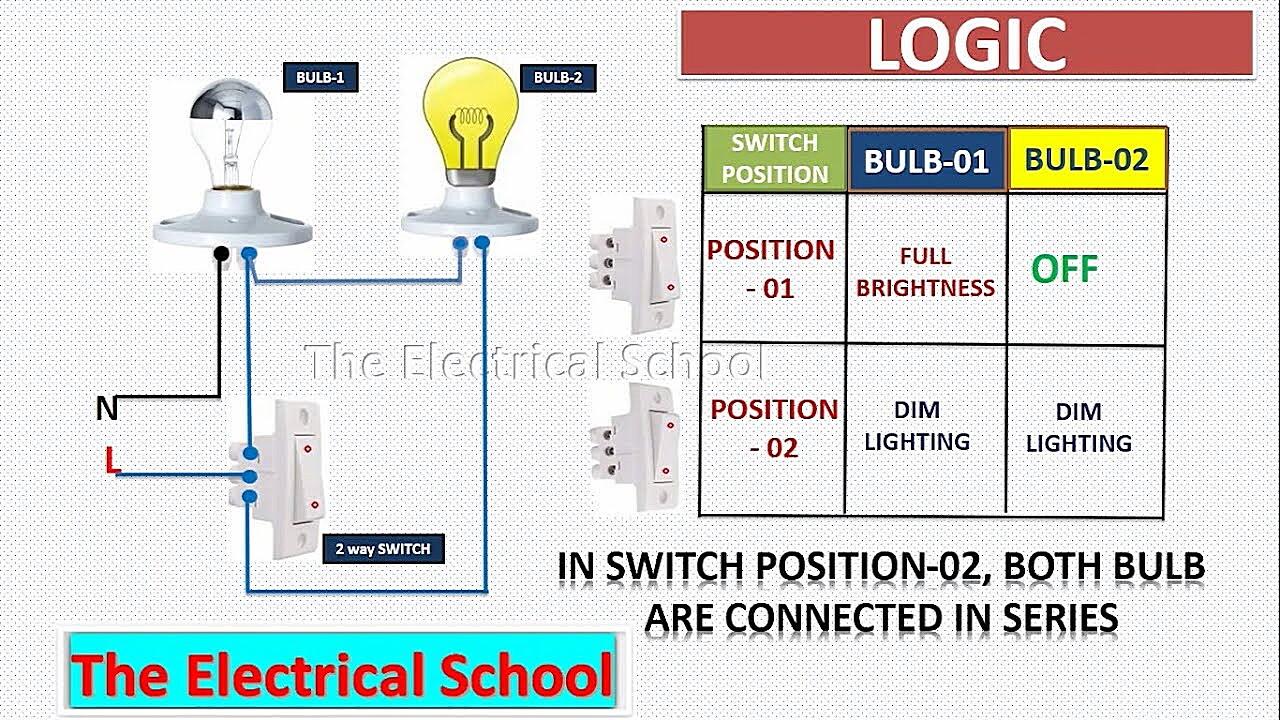
Now, a crucial detail to remember: standard single-pole, single-throw (SPST) switches aren’t the right tool for the job. We need something a little more sophisticated — three-way switches! These switches have three terminals instead of two, allowing them to redirect the current through different paths depending on their position. This is the key to making the parallel switch magic happen.
2. Safety First
Before we get our hands dirty (or rather, our screwdrivers busy), a word of utmost importance: safety. Electrical work can be dangerous if not handled with care. Always, always disconnect the power supply at the breaker box before you start messing with any wiring. This simple step can prevent nasty shocks and ensure you have a safe working environment.
Think of it like this: you wouldn’t try to change a tire on a moving car, would you? Similarly, you shouldn’t tinker with electrical circuits that are still energized. It’s just not worth the risk. So, flip that breaker switch off, double-check with a non-contact voltage tester to be absolutely sure, and then proceed with confidence.
Another good practice is to have a buddy around when you’re working with electricity. Not only can they hand you tools and offer moral support, but they can also call for help in case of an emergency. Two heads are better than one, especially when dealing with potentially hazardous situations.
Finally, if you’re not comfortable working with electricity, don’t be afraid to call a qualified electrician. They have the knowledge, skills, and experience to handle electrical work safely and efficiently. It’s better to be safe than sorry, and a professional can ensure the job is done right the first time.
3. Wiring Three-Way Switches in Parallel
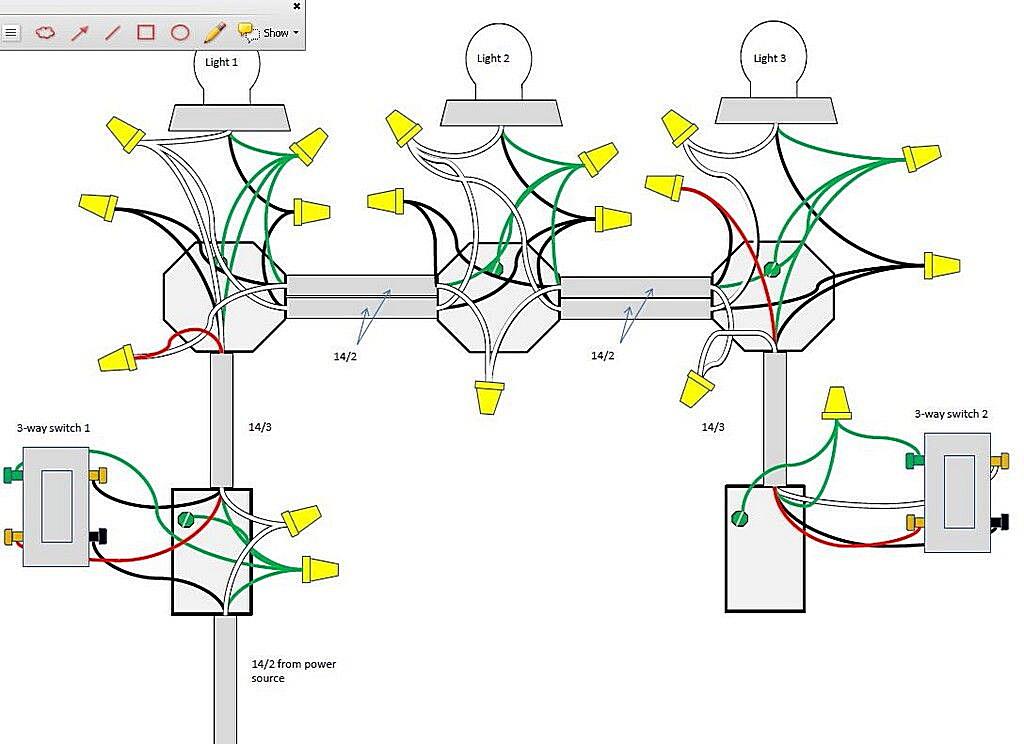
Alright, with safety precautions in place, let’s dive into the wiring process. Remember those three-way switches we talked about? These are your key to success. Typically, you’ll have two traveler wires connecting the two switches, and a common wire feeding power to the first switch and another common wire running from the second switch to the light fixture.
The “traveler” wires are the secret sauce. These wires create the multiple pathways that allow either switch to control the light. They essentially create a “bridge” between the two switches, allowing the current to flow regardless of the position of either switch. The common wires are simply the entry and exit points for the electrical current.
First, identify the common terminal on each three-way switch. This terminal is usually marked with a different color screw (often black) than the other two (usually brass). Connect the incoming power wire to the common terminal of the first switch, and connect the wire leading to the light fixture to the common terminal of the second switch.
Next, connect the two traveler wires between the remaining two terminals on each switch. It doesn’t matter which traveler wire goes to which terminal, as long as they’re connected between the two switches. Once all the wires are securely connected, carefully tuck them back into the electrical boxes, mount the switches, and restore power to the circuit. Now, test your setup and enjoy the convenience of controlling your light from multiple locations!
4. Troubleshooting Common Issues
Even with careful planning and execution, sometimes things don’t go exactly as expected. If your parallel switch setup isn’t working properly, don’t panic! There are a few common issues you can troubleshoot to get things back on track. One common culprit is incorrect wiring. Double-check all your connections to ensure they match the wiring diagram.
Another potential issue is a faulty switch. Sometimes, switches can fail internally, preventing them from completing the circuit even when they’re in the “on” position. You can test a switch using a multimeter to check for continuity. If the switch doesn’t show continuity when it’s supposed to, it’s likely the culprit and needs to be replaced.
Loose connections can also cause problems. Over time, wires can loosen from their terminals, creating intermittent or non-existent connections. Gently tug on each wire to ensure it’s securely attached to its terminal. If you find any loose wires, tighten the screws to ensure a solid connection.
Finally, check your breaker. A tripped breaker can obviously kill the power to the entire circuit. If your lights aren’t working at all, head to your breaker box and make sure the breaker for that circuit is in the “on” position. If it’s tripped, reset it and see if that resolves the issue. If the breaker trips repeatedly, there may be a short circuit in the wiring, which should be investigated by a qualified electrician.
5. Advantages and Disadvantages
Like everything in life, connecting switches in parallel has its pros and cons. The biggest advantage is the convenience of controlling a light or device from multiple locations. This is especially useful in hallways, stairwells, and large rooms where you might want to turn the light on or off from either end.
Another benefit is redundancy. If one switch fails, the other switch can still control the light, ensuring you’re not left in the dark. This can be a lifesaver in situations where you rely on that light for safety or security.
However, there are also some drawbacks to consider. Parallel switch wiring requires the use of three-way switches, which are slightly more expensive than standard switches. The wiring can also be a bit more complex, requiring careful planning and execution.
Finally, troubleshooting a parallel switch setup can be more challenging than troubleshooting a simple single-switch circuit. However, with a little patience and the right tools, you can usually diagnose and fix any issues that arise. Ultimately, the benefits of parallel switch wiring often outweigh the drawbacks, making it a worthwhile investment for many homeowners.